Current Sensor
The alternator current sensor is a clamp on hall effect type.
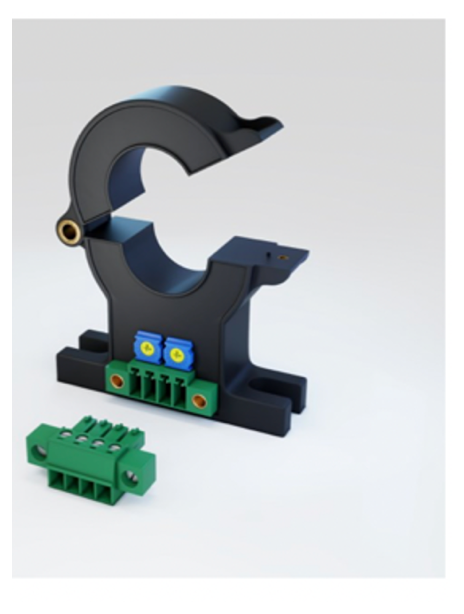
Keep this dry
This sensor has no weatherproofing. Mount it in a dry location — inside a battery box, electrical panel, or enclosure. Do not expose to bilge splash, condensation, or excessive moisture.
Mounting and Wiring
- Choose the driest, coolest, most vibration free location you reasonably can.
- Route the alternator output cable through the sensor jaw. The arrow on the sensor body indicates positive flow direction, but it's invertable with a software toggle if you get it backwards.
- Close and secure the jaw with the provided screw, and support it so nothing chafes. The two 316 stainless wood screws in the kit fasten the sensor body down; they are sized for plywood or OSB.
-
Ethernet Cable 1 (the left RJ5 port, alternator side) contains the wiring for this current sensor. Bring its cut end to the sensor and land four of its conductors in the green 4-pin screw-terminal plug shown in the photo — the same connector family as the XREG-010 board's Power/Field connector:
Sensor pin Cable 1 wire Cable 1 pin Signal 1 Blue/White 5 +5 V supply 2 Green 6 GND — power return 3 Brown/White 7 Vout (signal to regulator) 4 Brown 8 GND — signal return -
Put dielectric grease in each terminal of the screw plug first, before any wire goes in.
- Strip the Cat6 conductors and clamp bare copper under the screws.
- Secure both the Cat6 run and the alternator output cable close to the sensor, for strain relief.
The complete pinout for all four cables is in Data Cables & Pinout.
Inside the sensor
One was sawed in half. Teardown photographs and comments on waterproofing: QNHCK1-21 Hall Current Sensor.
Specifications, output scaling, and how the sensor works: Hardware → Sensors → Current Sensor.